From a homeowner safety standpoint, inspecting garage doors is one of the most important functions performed by a home inspector. By finding problems with a garage door and it’s safety features, we can help prevent disastrous accidents from happening to our clients and their children.
Unfortunately, by inspecting these features on the garage door, we open ourselves up to liability if these features fail or are improperly installed, and we inadvertently cause damage to the door or the operator while we’re performing our tests.
Below is the procedure that I follow when testing a garage door and opener. While we can never fully eliminate all risk and liability when we’re doing home inspections, by following this process, we can help to minimize the risk of causing damage to a homeowner’s garage door.
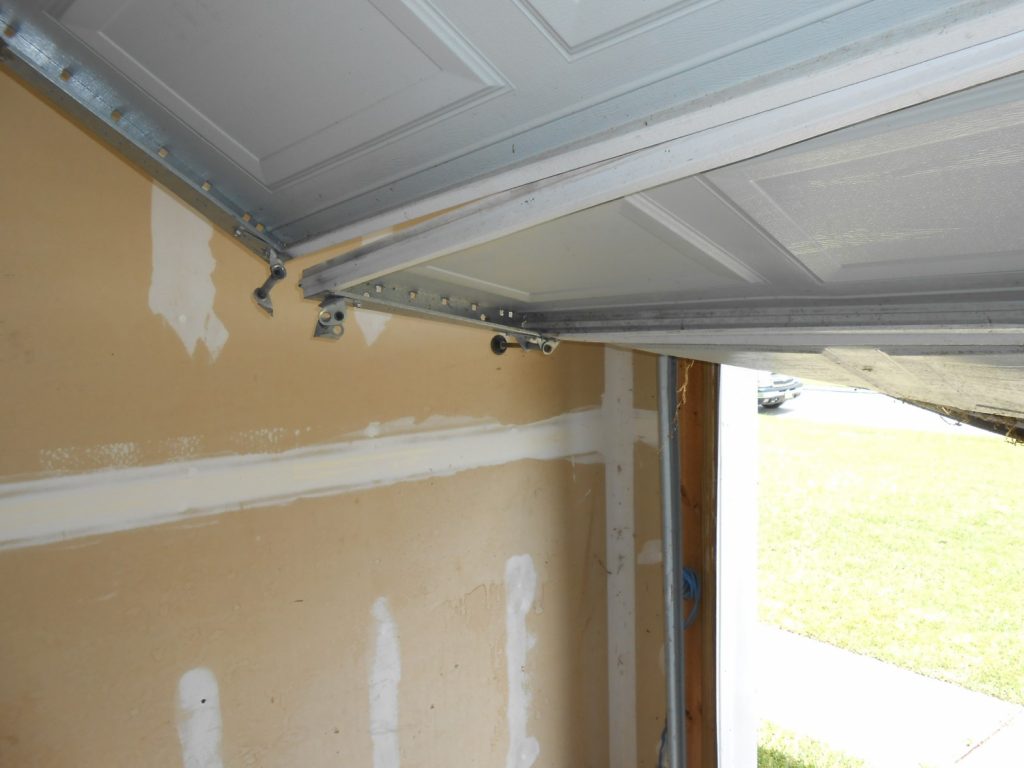
- Check side and center tracks for proper attachment and alignment
- Walk to one side of the door and scan down the track, checking the rollers and brackets for proper installation and alignment
- Check for proper installation of the eye beam sensor (max 6″ from the floor)
- Walk towards the center of the door, checking brackets for proper installation
- Examine the j-bar/opener arm attachment point on the door for any signs of damage or repair (if there are any signs of damage here, it is recommended that no pressure test be performed on the door)
- Verify that a manual disconnect cord and handle are installed and within 6′ of the floor
- Walk to the other side of the door and scan down the track, checking the rollers and brackets for proper installation and alignment
- Check for proper installation of the eye beam sensor (max 6″ from the floor)
- While walking to the wall-mounted opener control, check the opener to verify that it is plugged directly into an outlet (no extension cords allowed)
- Press the control to open the door, watching for any signs of stress or strain
- Press the button to close the door
- While door is closing, walk to the opening and interrupt the eye sensor light beam with you foot to verify that the door reverses
- Once door begins to reverse, place 2″ x 4″ (on flat) across the point where the door meets the ground, directly in line with the center line of the door
- While door is opening, walk back to press the controller again to close the door
- Door should reverse upon striking the 2″ x 4″
- Remove your 2′ x 4″ and close the door
If at any point during your inspection, something is broken or not properly installed, you must decide whether or not to proceed with the remainder of the inspection steps. Some issues are minor, and testing may continue, while other issues are significant and should cause you to discontinue your testing procedure.

Whenever stopping your inspection, always remember to include a picture of the damaged item in your report, indicate that the testing was stopped due to a potential deficiency, write that a limited inspection was performed on this item, and recommend further evaluation.
PLEASE NOTE that this information is being provided to you for educational purposes only. Any reliance on this information as documentation to be used in your inspection report (to provide to your clients) or to amend or alter your inspection process is done at your own risk. No advisory relationship between us is expressed or implied. We always recommend that proper legal representation be consulted prior to making any substantive changes to your home inspection report, inspection process or inspection contract. This information is provided in consideration of this foregoing disclaimer.